Introduction
This tutorial guides you through integrating the Scenes API into your iTwin Viewer application. You will learn how to manage scenes — curated visual compositions that organize and present data from one or more iTwin repositories into a single, shareable visualization. Each scene is scoped to a single iTwin, which governs scene permissions, but can reference data sources across multiple iTwins — including iModels, reality data, geospatial connections, and other repository resources — giving you full control over what data is shown and how it is presented.
In this tutorial we focus on a subset of scene capabilities: listing scenes, creating a new scene that captures the current camera position, activating a scene to restore that captured camera position, and deleting a scene. First, we explore the basics of the Scenes API and how to make direct HTTP requests using the fetch API. Then, we build a viewer widget that ties these operations together. To explore the full range of capabilities available for scenes, see the Scenes API documentation.
Info
Skill level:
Basic
Duration:
60 minutes
Prerequisites
This tutorial assumes that you have:
- Your own local iTwin Web Viewer application, based on the template @itwin/web-viewer
- See the Get Started! tutorial for instructions.
- Configured your viewer application to open the "House Model" sample iModel.
- See the Create a test iModel from a Bentley provided sample tutorial for instructions on using a sample iModel.
- An iTwin with appropriate access permissions to manage scenes.
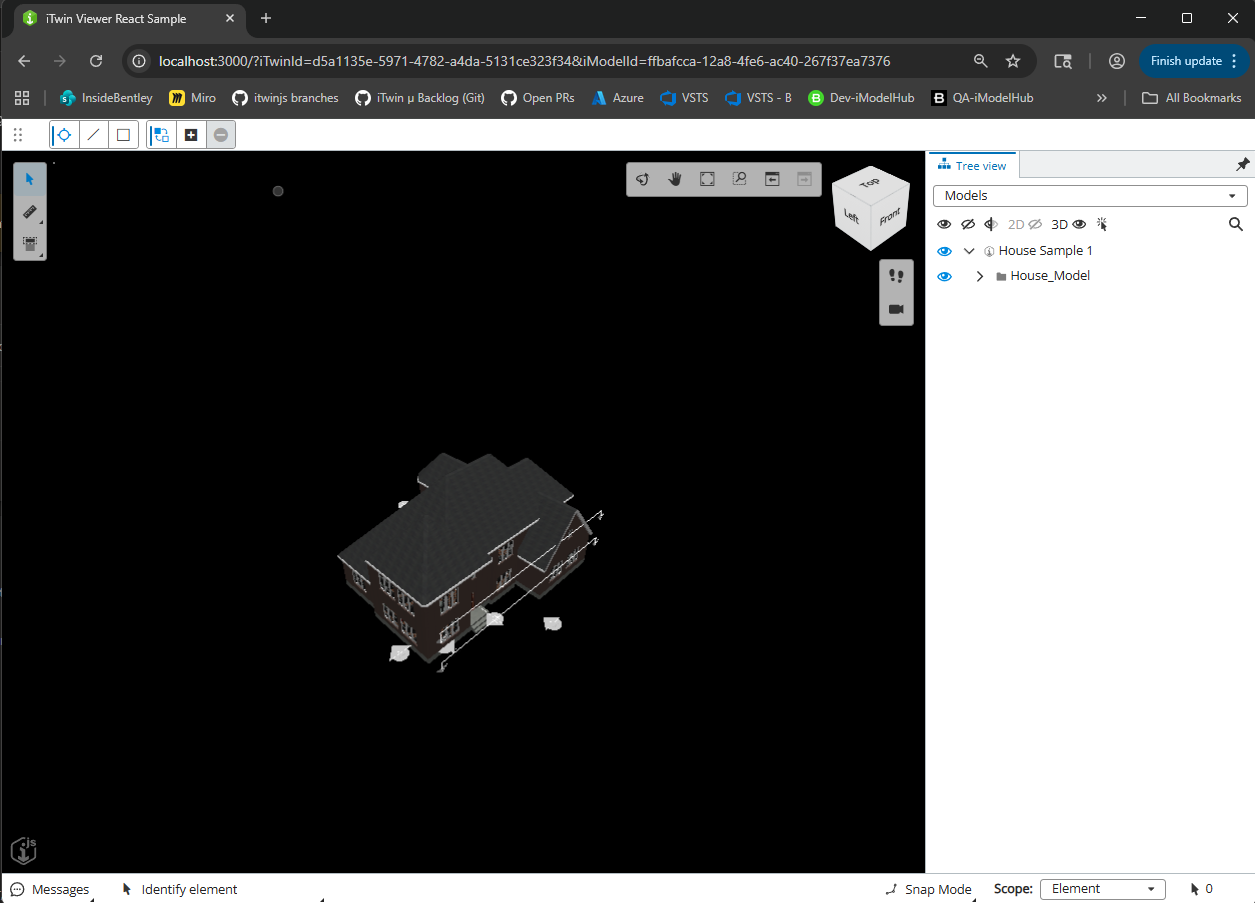
If all prerequisites are complete, your viewer should look similar to this when opening the House Model sample iModel.
1. Understanding iTwin scenes
In this section, you will learn what scenes are, what the Scenes API provides, and how this tutorial approaches API integration before you start building the widget.
1.1 What are scenes?
A scene is a curated visual composition tied to a single iTwin that selectively assembles data from one or more of that iTwin's repositories into a single, shareable visualization. A scene is not limited to a single iModel — it can reference reality data, external geospatial connections, and any other repository resource associated with the iTwin. Scenes let you organize that data into logical groups using Layers and parent-child hierarchies, controlling what is shown, how it is presented, and to whom.
A scene can capture:
- Camera position and orientation: The exact viewpoint from which the data is viewed
- Layer composition: Which iTwin repositories and data sources are included, and their display order
- Display settings: Rendering modes, visual overrides, and cutout definitions
- Element visibility and emphasis: Which elements are shown, hidden, isolated, or de-emphasized
Scenes are particularly useful for:
- Multi-dimensional data management: Combining reality data, parts of multiple iModels, 4D schedules, and map layers into one cohesive visualization — or creating thematic data groups such as environmental or cost categories, regardless of data type
- Discipline-specific isolation: Tailoring visualizations for targeted audiences — for example, providing electricians with wiring details or giving commercial managers focused access to floor plans
- Interactive design presentations: Curating a sequence of scenes to guide an audience through a visual narrative
- Coordination and sharing: Sharing a specific visual context with team members so everyone sees the same curated view
For more information, see the Scenes API Overview and Use Cases.
Note: This tutorial focuses on a simplified subset — capturing camera positions and restoring them — but the Scenes API supports the full range of capabilities described above.
1.2 The Scenes API
The Scenes API provides endpoints to manage scenes associated with an iTwin:
- List scenes:
GET /scenes/?iTwinId={iTwinId}- Retrieve all scenes for a given iTwin - Get scene objects:
GET /scenes/{sceneId}/objects?iTwinId={iTwinId}- Fetch scene data objects - Create scene:
POST /scenes/?iTwinId={iTwinId}- Save the current viewer state as a new scene - Delete scene:
DELETE /scenes/{sceneId}?iTwinId={iTwinId}- Remove a scene permanently
In this tutorial, you will focus on these core operations using direct HTTP requests.
1.3 Making API requests
In this tutorial, you will interact with the Scenes API directly using the fetch API. This approach gives you full control over the HTTP requests and helps you understand the API structure. You will create a ScenesClient class with static methods that handle authentication and make requests to the Scenes API endpoints.
You can find the complete working code in the iTwin Scenes Tutorial GitHub repository.
2. Setting up the Scenes widget
In this section, you will create the foundational files for your Scene Manager: a ScenesClient for API communication, a ScenesCache for local data management, a ScenesWidget component to display scenes, and a ScenesWidgetProvider to register it with the viewer.
Note: You can reference the complete code in the scenes-tutorial repository to see the full implementation.
2.1 Creating the ScenesClient class
Create a ScenesClient.tsx file in your src/components directory. This class contains static methods for interacting with the Scenes API using direct HTTP requests.
The class includes:
- A
getAuthorization()method that retrieves the access token fromIModelApp.authorizationClient - A
populateContext()method that stores the iTwin Id and iModel Id for use in API calls
You will add API methods to this class as you build out each feature.
ScenesClient class structure
import { IModelApp, IModelConnection } from "@itwin/core-frontend";

interface ProjectContext {
iModelId?: string;
iTwinId: string;
}

export class ScenesClient {
private static _projectContext: ProjectContext;

/** Get token authorization */
private static async getAuthorization() {
  const token = await IModelApp.authorizationClient!.getAccessToken();
  const parts = token.split(" ");
  return parts.length === 2
    ? { scheme: parts[0], token: parts[1] }
    : { scheme: "Bearer", token };
}

/** Initialize the context for API requests */
public static async populateContext(iModel: IModelConnection) {
  if (ScenesClient._projectContext) return;
  ScenesClient._projectContext = {
    iTwinId: iModel.iTwinId!,
    iModelId: iModel.iModelId
  };
}
}
2.2 Adding the getAllScenes method
Add the getAllScenes method to your ScenesClient class in ScenesClient.tsx. This method:
- Constructs the API URL with the iTwin Id
- Gets the authorization token
- Makes a GET request to the
/scenes/endpoint - Returns the array of scenes
The method uses $top=100 to retrieve up to 100 scenes. We need this method now to display the scene list in the widget.
getAllScenes method
/** Gets all scenes for the iTwin using REST API.
* Read more at https://developer.bentley.com/apis/scenes/operations/get-all-scenes/
*/
public static async getAllScenes(): Promise<any[] | undefined> {
const { iTwinId } = ScenesClient._projectContext;
const authorization = await this.getAuthorization();
const url = `https://api.bentley.com/scenes/?iTwinId=${iTwinId}&$top=100`;
const options = {
  headers: {
    Authorization: `${authorization.scheme} ${authorization.token}`,
    Accept: "application/vnd.bentley.itwin-platform.v1+json",
  },
  method: "GET",
};

try {
  const response = await fetch(url, options);
  if (!response.ok) throw new Error(response.statusText);
  const data = await response.json();
  return data?.scenes as any[];
} catch (error) {
  console.error(error);
  return undefined;
}
}
2.3 Creating the ScenesCache class
Create a ScenesCache.tsx file in your src/components directory. For now, this is just a shell class with an internal Map that stores scene-object arrays keyed by scene Id. When we implement create scene (Section 3) and activate scene (Section 4), those methods will populate this cache so that scene data retrieved from the API is stored locally and doesn't need to be fetched again on subsequent activations.
ScenesCache class shell
export class ScenesCache {
private static scenesDataCache = new Map<string, any[]>();
}
2.4 Creating the ScenesTile component
Create a ScenesWidget.tsx file in your src/components directory. Start by adding the ScenesTile component, which renders an individual scene card using iTwinUI's Tile component. It:
- Accepts a
sceneobject, the currentlyselectedId, and anonSceneTileClickcallback - Displays the scene's
displayNameanddescription - Highlights the tile when it matches the selected scene Id
- Calls
onSceneTileClickwhen the user clicks or presses a key on the tile
ScenesTile component
import { Alert, Tile } from "@itwin/itwinui-react";
import React from "react";
import { ScenesClient } from "./ScenesClient";

const ScenesTile = (props: {
onSceneTileClick: (sceneId: string) => Promise<void>;
scene: any;
selectedId?: string;
}) => {
const { onSceneTileClick, scene, selectedId } = props;

const handleKeyDown = async () => {
  await onSceneTileClick(scene.id);
};

return (
  <div
    onClick={handleKeyDown}
    onKeyDown={handleKeyDown}
    role="button"
    tabIndex={0}
    className="scenes-tile-div"
  >
    <Tile
      name={scene.displayName}
      isSelected={selectedId === scene.id}
      className="scenes-tile"
      description={scene.description}
      variant="default"
    />
  </div>
);
};
2.5 Creating the ScenesWidget component
Below ScenesTile in the same ScenesWidget.tsx file, add the main ScenesWidget component. This is the widget's top-level component that:
- Uses
useStateto track the currently selected scene and the full scene list - Uses
useEffectto callScenesClient.getAllScenes()on mount and populate the list - Renders a
ScenesTilefor each scene, passing the click handler and selected Id
For now, clicking a tile only selects it visually. You will wire up scene activation in a later section. The scenes-controls div is a placeholder where you will add the Add Scene and Delete Scene buttons.
ScenesWidget component
export const ScenesWidget = () => {
const [selectedSceneId, setSelectedSceneId] = React.useState<string | undefined>();
const [scenesCache, setScenesCache] = React.useState<any[]>([]);

// Initial load of scenes
React.useEffect(() => {
  const loadScenes = async () => {
    const scenes = await ScenesClient.getAllScenes();
    setScenesCache(scenes ?? []);
  };
  void loadScenes();
}, []);

// Handle selecting a scene
const handleViewScene = async (sceneId: string): Promise<void> => {
  setSelectedSceneId(sceneId);
};

return (
  <div className="scenes-wrapper">
    <div className="scenes-banner">
      <Alert type="informational">
        Click on a scene below to select it.
      </Alert>
    </div>
    <div className="scenes-controls">
      {/* We will add control buttons here in later sections */}
    </div>
    <div className="scenes-tile-list">
      {scenesCache.map((scene) => (
        <ScenesTile
          key={scene.id}
          scene={scene}
          onSceneTileClick={handleViewScene}
          selectedId={selectedSceneId}
        />
      ))}
    </div>
  </div>
);
};
2.6 Creating the ScenesWidgetProvider class
Add the following imports to the top of ScenesWidget.tsx.
import {
  StagePanelLocation,
  StagePanelSection,
  UiItemsProvider,
  Widget,
  WidgetState,
} from "@itwin/appui-react";
Then add a ScenesWidgetProvider class at the bottom of ScenesWidget.tsx. This class implements UiItemsProvider from @itwin/appui-react and tells the viewer where to render the widget. Since it directly references the ScenesWidget component defined in the same file, there's no need for an extra import or a separate file.
The provider does the following.
- Checks that the requested location is the right stage panel (
StagePanelLocation.Right) - Returns a
Widgetdefinition with anid,label, default state of Open, and theScenesWidgetcomponent as itscontent
Next, register the provider in your App.tsx (or wherever you configure the viewer) by adding it to the uiProviders array. You also need to call ScenesClient.populateContext during app initialization so that the iTwin Id and iModel Id are available before any API calls are made. Pass it to the Viewer onIModelConnected callback.
// App.tsx (excerpt)
import React from "react";
import { Viewer } from "@itwin/web-viewer-react";
import { ScenesClient } from "./components/ScenesClient";
import { ScenesWidgetProvider } from "./components/ScenesWidget";

const uiProviders = [new ScenesWidgetProvider()];

export default function App() {
  return (
    <Viewer
      // ...other viewer props
      uiProviders={uiProviders}
      onIModelConnected={async (iModel) => {
        await ScenesClient.populateContext(iModel);
      }}
    />
  );
}
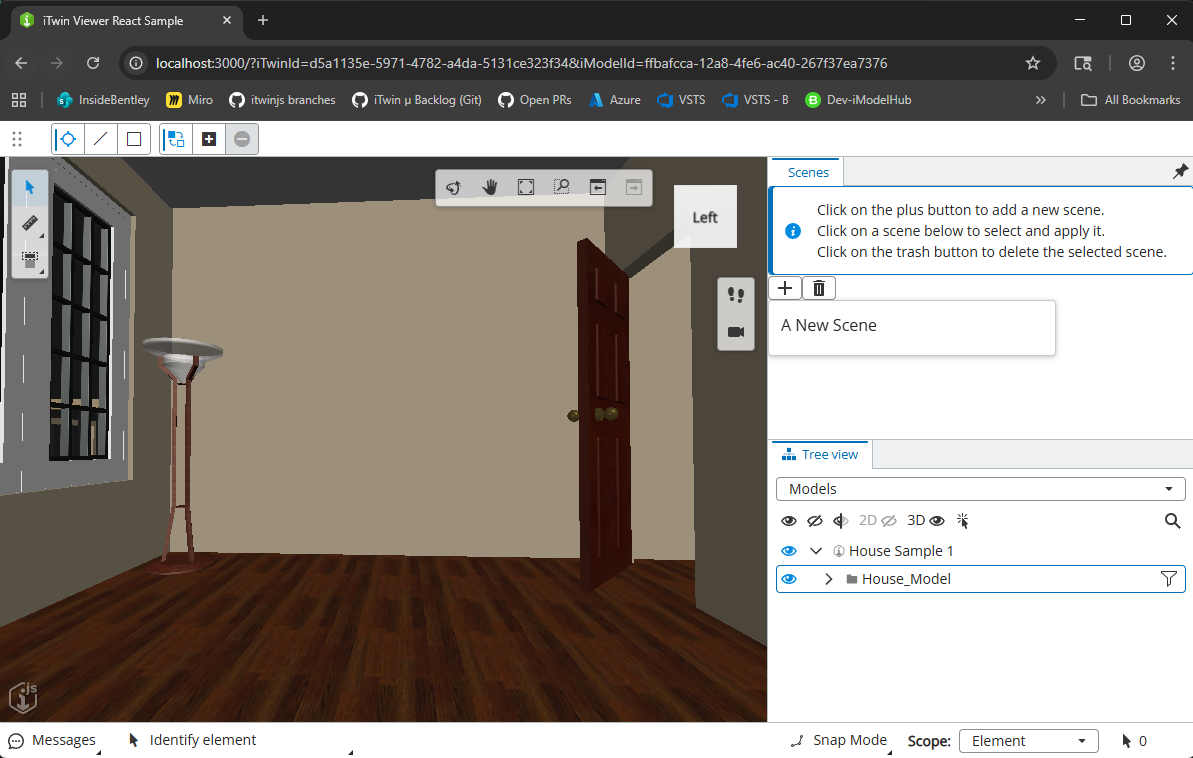
Once registered, the Scenes widget will appear as a dockable panel on the right side of the viewer. At this point, it will list any existing scenes, but you cannot yet create, activate, or delete them. Add those features next.

After registering the ScenesWidgetProvider, the Scenes widget appears in the right panel. It will be empty until scenes are created.
ScenesWidgetProvider
/**
* Provide the Scenes widget to the viewer UI via the App UI providers system.
* This provider places the widget in the right stage panel.
*/
export class ScenesWidgetProvider implements UiItemsProvider {
public readonly id = "ScenesWidgetProvider";

public provideWidgets(
  _stageId: string,
  _stageUsage: string,
  location: StagePanelLocation,
  section?: StagePanelSection
): ReadonlyArray<Widget> {
  const widgets: Widget[] = [];
  if (
    location === StagePanelLocation.Right &&
    section === StagePanelSection.Start
  ) {
    widgets.push({
      id: "ScenesWidget",
      label: "Scenes",
      defaultState: WidgetState.Open,
      content: <ScenesWidget />,
    });
  }
  return widgets;
}
}
3. Creating a scene
Now implement the ability to create a new scene by capturing the current viewport state and saving it via the API.
3.1 Adding the createScene method to ScenesClient
Add the createScene method to your ScenesClient class in ScenesClient.tsx. This method:
- Takes a scene object containing the scene data
- Makes a POST request to the
/scenes/endpoint - Returns the created scene with its new Id
The scene object must include:
displayName: Name of the scenesceneData: An object containing anobjectsarray with scene objects (View3d, layers, etc.)
ScenesClient.createScene method
/** Creates a scene using REST API.
* Read more at https://developer.bentley.com/apis/scenes/operations/create-scene/
*/
public static async createScene(scene: any): Promise<any> {
const { iTwinId } = ScenesClient._projectContext;
const authorization = await this.getAuthorization();
const url = `https://api.bentley.com/scenes/?iTwinId=${iTwinId}`;

const options = {
  headers: {
    Authorization: `${authorization.scheme} ${authorization.token}`,
    Accept: "application/vnd.bentley.itwin-platform.v1+json",
    "Content-Type": "application/json",
  },
  method: "POST",
  body: JSON.stringify(scene),
};

try {
  const response = await fetch(url, options);
  if (!response.ok) throw new Error(response.statusText);
  const data = await response.json();
  return data?.scene;
} catch (error) {
  console.error(error);
  return undefined;
}
}
3.2 Implementing scene creation - camera capture
Add the following imports to the top of ScenesCache.tsx.
import { IModelApp, ViewState3d } from "@itwin/core-frontend";
import { Point3d, Vector3d } from "@itwin/core-geometry";
import { ScenesClient } from "./ScenesClient";
Then add the createScene method to your ScenesCache class. The first part captures the current viewport state:
- Gets the selected viewport from
IModelApp.viewManager - Checks if the camera is on (perspective) or off (orthographic)
- Calculates the eye point, direction vector, and up vector based on the view type
This captures where the camera is positioned and what it is looking at.
ScenesCache.createScene — camera capture
public static async createScene(displayName: string): Promise<string> {
const vp = IModelApp.viewManager.selectedView;
if (vp === undefined) throw new Error("Could not get the viewport");

const view = vp.view as ViewState3d;
const isCameraOn = vp.isCameraOn;
const frustum = view.calculateFrustum();

let eyePoint: Point3d;
let directionVector: Vector3d;
let upVector: Vector3d;

if (isCameraOn) {
  // Perspective view calculations
  eyePoint = view.getEyePoint();
  upVector = view.getUpVector(eyePoint);
  directionVector = Vector3d.createStartEnd(eyePoint, view.getTargetPoint());
} else {
  // Orthographic view calculations
  const xVec = view.getXVector();
  const yVec = view.getYVector();
  const viewDirection = view.getZVector().negate();
  const delta = view.getExtents();
  eyePoint = view
    .getOrigin()
    .plus3Scaled(
      viewDirection,
      view.getBackDistance(),
      xVec,
      0.5 * delta.x,
      yVec,
      0.5 * delta.y,
    );
  upVector = yVec;
  directionVector = view.getZVector().negate();
}
}
3.3 Implementing scene creation - building the scene object
The second part of createScene continues in the same method body:
- Builds a scene object with the required structure — a
sceneData.objectsarray containing a View3d object with camera position, direction, up vector, and frustum data - Calls
ScenesClient.createScene()to save the scene via the API - Caches the scene data for quick access later
The scene structure follows the Scenes API schema with kind: "View3d" and a data object containing all camera parameters.
ScenesCache.createScene — build and send
  // Build the scene object
const scene: any = {
  displayName,
  sceneData: {
    objects: [
      {
        displayName: "Default View",
        kind: "View3d",
        version: "1.0.0",
        data: {
          isOrthographic: !vp.isCameraOn,
          position: eyePoint.toJSONXYZ(),
          aspectRatio: vp.view.getAspectRatio(),
          direction: directionVector.toJSONXYZ(),
          up: upVector.toJSONXYZ(),
          near: frustum?.frontCenter.z ?? 0,
          far: frustum?.frontCenter.z ?? 100,
          ecefTransform: [1, 0, 0, 0, 0, 1, 0, 0, 0, 0, 1, 0, 0, 0, 0, 1],
        },
      },
    ],
  },
};

// Create the scene via API
const createdScene = await ScenesClient.createScene(scene);
if (createdScene === undefined)
  throw new Error(`Scene "${displayName}" could not be created.`);

// Cache the scene data
const sceneData = await ScenesClient.getAllSceneObjects(createdScene.id);
ScenesCache.scenesDataCache.set(createdScene.id, sceneData!);

return createdScene.id;
3.4 Adding the getAllSceneObjects method to ScenesClient
Add the getAllSceneObjects method to your ScenesClient class in ScenesClient.tsx. This method is used by ScenesCache.createScene (section 3.3) to cache a newly created scene's data. It:
- Takes a scene Id
- Makes a GET request to the
/scenes/{sceneId}/objectsendpoint - Returns the array of scene objects
Scene objects contain the actual data for the scene, including View3d camera settings, reality model references, and other scene components. You will also use this method when activating scenes in Section 4.
ScenesClient.getAllSceneObjects method
/** Gets all objects for a scene using REST API.
* Read more at https://developer.bentley.com/apis/scenes/operations/get-scene/#get-scene-objects
*/
public static async getAllSceneObjects(sceneId: string): Promise<any[] | undefined> {
const { iTwinId } = ScenesClient._projectContext;
const authorization = await this.getAuthorization();
const url = `https://api.bentley.com/scenes/${sceneId}/objects?iTwinId=${iTwinId}`;

const options = {
  headers: {
    Authorization: `${authorization.scheme} ${authorization.token}`,
    Accept: "application/vnd.bentley.itwin-platform.v1+json",
  },
  method: "GET",
};

try {
  const response = await fetch(url, options);
  if (!response.ok) throw new Error(response.statusText);
  const data = await response.json();
  return data?.objects as any[];
} catch (error) {
  console.error(error);
  return undefined;
}
}
3.5 Adding the Add Scene button to the widget
Add the following imports to the top of ScenesWidget.tsx.
import { SvgAdd } from "@itwin/itwinui-icons-react";
import { Alert, IconButton, Tile, Tooltip } from "@itwin/itwinui-react";
import { ScenesCache } from "./ScenesCache";
Then replace the scenes-controls placeholder div with the button shown in the accompanying code.
When clicked, the Add Scene button calls ScenesCache.createScene to capture the current viewport and save it as a new scene named "A New Scene", then refreshes the scene list.
Clicking the Add Scene button captures the current viewport and creates a new scene.
Add Create button to ScenesWidget
// Replace the scenes-controls div in the render method with:
<div className="scenes-controls">
<Tooltip content="Add a scene">
  <IconButton
    size="small"
    onClick={async () => {
      await ScenesCache.createScene("A New Scene");
      setScenesCache((await ScenesClient.getAllScenes()) ?? []);
    }}
    label="Add Scene"
  >
    <SvgAdd />
  </IconButton>
</Tooltip>
</div>
4. Activating a scene
Now implement the ability to click a scene and have the viewport navigate to the saved camera position.
4.1 Implementing scene activation in ScenesCache
Add the applyView method to your ScenesCache class in ScenesCache.tsx. This method:
- Gets the viewport and fetches scene objects (from cache if available, otherwise from the API)
- Clones the current view state
- Iterates through scene objects looking for View3d objects
- Applies the camera settings using
newView.lookAt()— positioning the camera at the saved eye point, pointing it in the saved direction, and orienting it with the saved up vector - Changes the viewport to the new view with
vp.changeView()
ScenesCache.applyView method
public static async applyView(sceneId: string) {
const vp = IModelApp.viewManager.selectedView;
if (vp === undefined) throw new Error("Could not get the viewport");

// Get the scene objects (from cache or API)
let sceneObjs = ScenesCache.scenesDataCache.get(sceneId);
if (!sceneObjs) {
  sceneObjs = await ScenesClient.getAllSceneObjects(sceneId);
  ScenesCache.scenesDataCache.set(sceneId, sceneObjs!);
}

// Clone the current view
const newView = vp.view.clone() as ViewState3d;

// Apply each scene object
for (const obj of sceneObjs) {
  if (obj.kind === "View3d") {
    const sceneData = obj.data;
    newView.lookAt({
      eyePoint: {
        x: sceneData.position.x,
        y: sceneData.position.y,
        z: sceneData.position.z,
      },
      targetPoint: Point3d.create(
        sceneData.position.x,
        sceneData.position.y,
        sceneData.position.z,
      ).plus(
        Vector3d.create(
          sceneData.direction.x,
          sceneData.direction.y,
          sceneData.direction.z,
        ),
      ),
      upVector: Vector3d.create(sceneData.up.x, sceneData.up.y, sceneData.up.z),
      lensAngle: newView.camera.getLensAngle(),
    });
  }
}

// Apply the new view to the viewport
vp.changeView(newView);
}
4.2 Wiring up scene activation in the widget
Update the handleViewScene function in your ScenesWidget component to call ScenesCache.applyView. Previously it only set the selected scene Id — now it also navigates the viewport to the saved camera position.
If you have not already imported ScenesCache from section 3.5, add the import now.
Clicking a scene tile activates it, navigating the viewport to the saved camera position.
Wire up scene activation in the widget
// Update handleViewScene in ScenesWidget to apply the view.
const handleViewScene = async (sceneId: string): Promise<void> => {
setSelectedSceneId(sceneId);
await ScenesCache.applyView(sceneId);
};
5. Deleting a scene
Finally, add support for deleting scenes that are no longer needed.
5.1 Adding the deleteScene method to ScenesClient
Add the deleteScene method to your ScenesClient class in ScenesClient.tsx. This method:
- Takes a scene Id (returns false immediately if undefined)
- Makes a DELETE request to the
/scenes/{sceneId}endpoint - Returns true if the deletion was successful
ScenesClient.deleteScene method
/** Deletes a scene using REST API.
* Read more at https://developer.bentley.com/apis/scenes/operations/delete-scene/
*/
public static async deleteScene(sceneId: string | undefined): Promise<boolean> {
if (sceneId === undefined) return false;

const { iTwinId } = ScenesClient._projectContext;
const authorization = await this.getAuthorization();
const url = `https://api.bentley.com/scenes/${sceneId}?iTwinId=${iTwinId}`;

const options = {
  headers: {
    Authorization: `${authorization.scheme} ${authorization.token}`,
    Accept: "application/vnd.bentley.itwin-platform.v1+json",
  },
  method: "DELETE",
};

try {
  const response = await fetch(url, options);
  if (!response.ok) throw new Error(response.statusText);
  return true;
} catch (error) {
  console.error(error);
  return false;
}
}
5.2 Adding the Delete Scene button to the widget
Update ScenesWidget.tsx to add a Delete Scene button next to the existing Add Scene button. First, update your icon import.
import { SvgAdd, SvgDelete } from "@itwin/itwinui-icons-react";
Then add the Delete Scene button inside the scenes-controls div, after the Add Scene button.
When clicked, the Delete Scene button calls ScenesClient.deleteScene with the currently selected scene Id, then refreshes the scene list. If no scene is selected, the method returns false and nothing happens.
You can also update the informational alert to reflect the full set of controls.
<Alert type="informational">
  Click the **Add Scene** button to add a new scene. <br />
  Click on a scene below to select and apply it. <br />
  Click the **Delete Scene** button to delete the selected scene.
</Alert>
Selecting a scene and clicking the Delete Scene button removes it from the list.
Add Delete button to ScenesWidget
// Add this button inside the scenes-controls div, after the Add button.
<Tooltip content="Delete scene">
<IconButton
  size="small"
  onClick={async () => {
    await ScenesClient.deleteScene(selectedSceneId);
    setScenesCache((await ScenesClient.getAllScenes()) ?? []);
  }}
  label="Delete Scene"
>
  <SvgDelete />
</IconButton>
</Tooltip>
What you've learned
Congratulations! You have successfully created a Scene Manager that integrates with the iTwin Viewer using direct API calls. Here's the finished product in action:
The completed Scene Manager: creating, activating, and deleting scenes in the iTwin Viewer.
You should now understand:
- What scenes are — curated, iTwin-scoped compositions that can assemble data from multiple repositories into a single visualization
- How to make direct API calls to the Scenes API using
fetchand proper authentication - How to set up a viewer widget by scaffolding a
ScenesClient,ScenesCache,ScenesWidget, andScenesWidgetProvider - How to list scenes by calling
GET /scenes/?iTwinId={iTwinId} - How to create scenes by capturing the current viewport camera state and calling
POST /scenes/ - How to activate scenes by fetching scene objects with
GET /scenes/{sceneId}/objectsand applying camera settings to the viewport - How to capture and restore a camera position through the scene creation and activation workflow
- How to delete scenes by calling
DELETE /scenes/{sceneId}and refreshing the UI
This Scene Manager provides a foundation for more advanced scene management features. You can extend it by:
- Adding a UI for editing scene names and descriptions
- Implementing scene thumbnails using viewport screenshots
- Incorporating reality data and other iTwin repository resources into scenes
- Adding element visibility and emphasis to scenes
- Implementing scene sharing and permissions
More resources that you may like
Was this page helpful?